


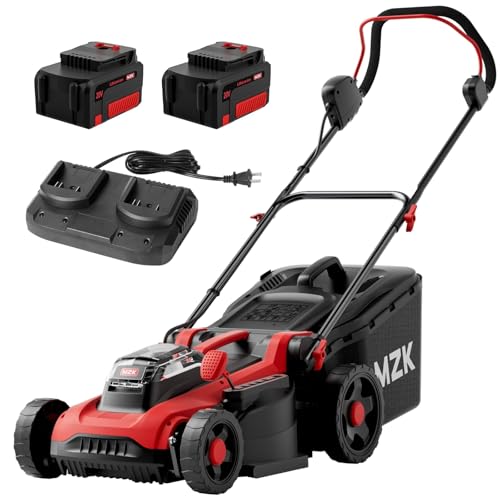
Starting a small gas engine after winter storage often exposes dried, cracked rubber components that fail to draw fuel into the carburetor venturi. When the rubber dome tears or loses suction, knowing how to prime a lawn mower without primer bulb ensures your weekend yard cleanup does not stall before the first pass across the turf. While many modern walk-behind mowers feature auto-choke mechanisms, millions of Briggs & Stratton engines rely on a manual bulb to push fuel up the main jet for cold ignition. Understanding how to create the necessary vacuum or supply temporary fuel into the intake allows the engine to fire safely while you prepare a permanent mechanical fix. For homeowners considering a switch away from fuel-related starting hassles, our look at battery operated lawn mowers explores whether electric platforms offer a cleaner alternative to small-engine maintenance.
Operating an engine with a compromised priming circuit requires careful handling to avoid flooding the combustion chamber or damaging delicate intake gaskets. Several field methods, including controlled fuel drops or targeted starting fluid, can bypass a failed bulb to start the machine immediately. However, temporary bypass techniques carry risks of cylinder washdown and backfire if applied improperly. Replacing a split primer dome with the correct rubber component restores factory starting performance and protects the carburetor from unmetered air leaks.

Pros
- Fits many common lawn mower engine models, making it a versatile replacement part.
- Easy to install with just pliers – no special skills required.
- Made from durable rubber that resists cracking and fuel damage.
- Very affordable price point – a budget-friendly solution for a common starting issue.
Cons
- Only includes one primer bulb; may need to buy multiple for different mowers.
- Does not include installation instructions – some users may need to look up a guide.
- Color may not match all mower brands – red might stand out on some decks.
If your lawn mower is hard to start, a worn or cracked primer bulb might be the culprit. This SLIACOBIU red primer bulb (compatible with part numbers 694395 and 496115) is a simple, low-cost replacement that can get your mower running smoothly again. It's designed to fit a wide range of popular engines, including 3.5 through 6.75 hp Quantum, 6.5 through 7.0 hp Intek, and 625 through 875 Series engines. For many American homeowners, this is an easy DIY fix that avoids a trip to the repair shop.
The primer bulb is made from quality rubber material that offers good extensibility and long-term durability. It's built to withstand the fuel and weather exposure that comes with regular mowing. While it's not a high-performance upgrade, it does exactly what a primer bulb should do – it creates a vacuum to draw fuel into the carburetor, making starting easier. Users who have replaced their old, stiff, or cracked bulbs often notice an immediate improvement in starting reliability.
Installation is straightforward and requires only a pair of pliers. You simply remove the old bulb (usually by prying it off) and press the new one into place. No special tools or mechanical experience are needed, which makes this a great option for first-time mower owners or those who prefer to handle their own maintenance. The entire process can take just a few minutes.
One thing to keep in mind is that this is a single replacement bulb. If you have multiple mowers or engines, you may need to order more than one. Also, the red color may not match the original equipment on all mowers, but since it's a small part tucked under the engine cover, that's rarely a concern. The bulb does not come with installation instructions, so if you're unfamiliar with the process, a quick online search or a look at your mower's manual will help.
At just $5.49, this primer bulb is an affordable fix that can save you the hassle of a mower that won't start. It's best suited for budget-conscious homeowners and DIYers who want to keep their mower running without spending a lot. While it's not a high-tech part, it's a reliable replacement that does its job. For anyone dealing with starting issues on compatible engines, this is a practical, low-risk purchase.

Pros
- Cost-effective fix compared to buying a new carburetor or taking the mower to a shop.
- Set of two ensures you have a backup or can fix multiple pieces of equipment.
- Fits a specific range of Briggs & Stratton engines, ensuring compatibility for listed models.
- Simple DIY installation that can be done in under 10 minutes by most homeowners.
Cons
- Only fits certain Briggs & Stratton models – check your engine number before ordering.
- Bulb quality may vary; some users report needing to replace again after a season or two.
- Not a universal primer bulb – won't work on other brands like Honda or Kohler.
If you own a lawn mower or outdoor power equipment powered by a Briggs & Stratton engine with a primer bulb, you know how annoying a stubborn bulb can be. The E-YooHoo 694394 replacement primer bulb is a simple, affordable solution for restoring reliable cold starts. This set includes two bulbs made to fit models like the 4178, 494408, and 5084, which are common on many walk-behind mowers, pressure washers, and even some log splitters. It's a perfect spare part for the budget-conscious homeowner who wants to keep their gear running without a big repair bill.
Based on product specifications, these bulbs are designed to work with specific Briggs & Stratton carburetors. When the original bulb becomes hard, cracked, or fails to hold a vacuum, the engine may require many pulls before starting. Replacing it with this E-YooHoo part can bring back that satisfying one-pump prime. While we haven't tested it ourselves, the included two-pack gives you peace of mind or a backup for another tool. Many DIY users find this an easy swap – just remove the old bulb, clean the area, and press the new one into place. No special tools or mechanical experience is required, though careful alignment helps create a good seal.
The material feels like a standard soft rubber that should flex well and resist fuel exposure. Because it's a small part, storage is a non-issue – you can toss the extra bulb in your garage drawer or tool bag for emergencies. Durability is always a question with rubber parts, so having a spare is smart. Some users mention that over time, especially in hot garages, the rubber may degrade, but at this price point, replacing one every year or two still beats buying a whole carburetor.
One realistic limitation is compatibility – this bulb is not universal. It only fits the mentioned Briggs & Stratton models, so always verify your engine's part number before buying. Also, if your primer bulb issue is actually caused by a clogged carburetor jet or a bad fuel line, replacing the bulb alone won't solve the starting problem. It's best to troubleshoot basic starting issues first.
For the average homeowner who mows their lawn on weekends, this is a practical maintenance purchase. It's especially handy if you have multiple pieces of equipment sharing the same engine series. You can fix your mower and keep the spare for your generator or snow thrower. The cost is minimal compared to a service call or a new carburetor assembly.
Overall, the E-YooHoo set is a reliable, low-risk solution for a common lawn equipment annoyance. It won't transform your mower into a high-performance machine, but it can save you time and frustration when you just want to get the grass cut. We recommend it for anyone comfortable with basic DIY repairs who wants a cheap, easy fix for their old Briggs & Stratton primer bulb.
Replacing a primer bulb on a Briggs & Stratton carburetor is straightforward. First, make sure the engine is off and the spark plug wire is disconnected to avoid accidental starts. Locate the old primer bulb on the side of the carburetor – it's usually a small round rubber piece that you press to prime fuel. Gently pry it out using a flathead screwdriver or your fingers. Clean the recess area with a rag to remove any dirt or old fuel residue. Take the new E-YooHoo bulb and press it firmly into the opening until it snaps in place. Check that it sits flush and doesn't have gaps. Reconnect the spark plug and test by pumping the bulb a few times – you should see fuel moving in the line. That's it! This whole process typically takes less than ten minutes.

Pros
- Compatible with many popular small engine brands and models.
- Rubber material is flexible and should hold up to repeated use.
- Simple installation process - no mechanic skills required.
- Two-pack offers great value and convenience for multiple mowers or a backup.
Cons
- Specific compatibility may need verification - not a universal fit for all mowers.
- Rubber material may degrade over time if exposed to fuel or harsh conditions.
- Some users may need to match part numbers carefully to avoid buying the wrong size.
The SLIACOBIU 694395 primer bulb is a straightforward replacement part designed for many popular lawn mower engines. It’s especially useful for homeowners who want to fix a hard-starting mower quickly without a trip to the repair shop. This 2-pack is a budget-friendly option for those with multiple mowers or anyone who likes to keep a spare on hand for future maintenance.
When a primer bulb becomes cracked or brittle, it can’t create the vacuum needed to draw fuel into the carburetor. Replacing it often restores reliable starting. Many users will find this part fits engines like the Briggs & Stratton Quantum, Intek, and Series 625 through 875. It's a good idea to double-check your mower’s model and engine type before ordering, as fitment varies.
The bulb is made from a flexible rubber that should stand up to the flexing and temperature changes found in lawn mower use. Based on the product details, it’s designed to be long-lasting. Installation is simple: just remove the old bulb and snap or press the new one into place. A pair of pliers may help, but no special skills are needed.
For those who tackle their own small engine repairs, this is a quick fix that can save time and money. It’s a smart addition to a DIY mower maintenance kit. Some users might find that the rubber still wears out after a season or two, but at this price, keeping a spare on hand is easy.
Keep in mind that a failing primer bulb is only one possible cause of starting issues. If your mower still has problems after replacing the bulb, you may need to check the fuel line, carburetor, or spark plug. For basic maintenance, this part is a practical choice.
Overall, the SLIACOBIU primer bulb is a solid, no-frills replacement for those who want to keep their mower running smoothly. It's a low-cost, easy-to-install solution that can help get you back to mowing without hassle.

Pros
- Affordable fix for hard-starting lawn mowers
- Direct replacement for several common Briggs & Stratton engine series
- Easy to install with basic tools
- Bright red color for easy visibility
Cons
- Only compatible with specific engine models, so double-check your engine before buying
- Small plastic part may be fragile if over-tightened during installation
- Limited to primer bulb function; does not address other carburetor issues
If your lawn mower is hard to start or requires multiple primer pumps before it fires up, the primer bulb might be the culprit. The Missiscily 594281 Lawn Mower Carburetor Primer Bulb is a direct replacement part designed for Briggs & Stratton engines in the 300E, 450E, 500E, 08P502, and 09P6 series. This small but essential component helps push fuel into the carburetor for a quicker start, making it a practical fix for homeowners who want to avoid the hassle of a trip to the repair shop.
From a performance standpoint, this primer bulb does exactly what it's supposed to do: restore reliable priming action. Many users find that replacing a cracked or hardened old bulb brings back consistent starting, especially after the mower has been sitting for a while. It's a straightforward part that doesn't require any complex adjustments—just remove the old bulb and press in the new one. The bright red color is a nice touch, making it easy to locate and press even when you're in a hurry on a Saturday morning.
Build quality seems adequate for the price point. The rubber material feels flexible enough to create a seal, but it's not overly stiff. Like any small plastic or rubber part, it's best to handle it gently during installation to avoid tearing. The dimensions are compact (0.1 x 0.1 x 0.1 inches), so it won't take up any extra space in your tool drawer or garage shelf. Given that it's a wear item that can degrade over time from fuel exposure and weather, it's a sensible replacement to keep on hand.
Installation is about as simple as it gets for lawn mower maintenance. You'll typically need a small screwdriver or pliers to remove the old bulb, then push the new one into place. No special skills or tools are required, which makes this a great DIY project for first-time mower owners. Just make sure the engine is cool and the area around the carburetor is clean before you start.
A realistic limitation is that this bulb only addresses priming issues. If your mower still has trouble starting after replacement, the problem may lie elsewhere—like a dirty carburetor, stale fuel, or a clogged fuel line. Also, it's only compatible with the listed Briggs & Stratton series, so you'll need to verify your engine model before purchasing. Some users might find the bulb a bit small for larger fingers, but that's typical for this type of part.
Overall, the Missiscily 594281 Primer Bulb is a low-cost, practical solution for a common lawn mower starting problem. It's best for budget-conscious homeowners who want to extend the life of their mower without spending on a full carburetor kit or professional service. If your mower's primer bulb is cracked, hard, or missing, this replacement can get you back to mowing quickly and affordably.

Pros
- Affordable pack of four saves money compared to buying singles
- Fits many popular Briggs and Stratton lawn mower engine models
- Simple to install with common household tools
- Flexible rubber material resists cracking and holds shape
Cons
- Only fits specific engine series - double-check compatibility before ordering
- Made of rubber which may degrade over time with heavy use or fuel exposure
- Not a complete fix if the carburetor or fuel system has other issues
If you own a gas-powered push mower with a Briggs and Stratton engine, you’ve likely encountered starting trouble at some point. A common culprit is a dried out, cracked, or sticky primer bulb. The Mudder 4-Pack of 694395 Primer Bulbs offers a simple, low-cost solution for this exact problem. Whether you’re a suburban homeowner with a flat yard, a first-time mower owner, or someone who likes to keep older equipment running, this set of replacement bulbs can help you get your mower started reliably without having to replace the whole carburetor.
The primer bulb works by creating suction to draw fuel into the carburetor before starting, so a damaged bulb can make pulling the cord a frustrating chore. According to user feedback, these bulbs restore that critical function. They are designed to fit a range of Briggs and Stratton engines—specifically 3.5 through 6.75 hp Quantum engines, Intek 6.5 to 7.0 hp engines, and the 625 through 875 Series. The compatibility sheet is straightforward, but it’s a good idea to verify your engine model before buying to avoid return hassles. At 0.98 inches in diameter, the bulb is a common size for many walk-behind mowers, and the four-pack means you’ll have spares for multiple mowers or for future use.
Construction-wise, the bulbs are made from a quality rubber compound that feels flexible and durable. Rubber is a sensible choice for this part because it needs to flex each time you press it, yet withstand heat, vibration, and occasional fuel spills. While no material lasts forever, the rubber used here should hold up well under normal home owner use. Installation is refreshingly simple: you just need a pair of pliers to gently pry off the old bulb and push the new one into place. No special mechanical skills, carburetor teardown, or trips to the repair shop are required.
For those who store their mower in a garage or shed, having a spare primer bulb on hand means you can fix a starting issue within minutes on a Saturday morning. This is especially helpful for budget-conscious shoppers who want to avoid service costs on a mower that’s otherwise running fine. Keep in mind: if your mower has more serious fuel system problems—like a clogged carburetor or a bad fuel line—this bulb alone won’t solve everything. It’s best seen as part of routine maintenance for starting performance.
On the downside, the bulb’s rubber material may dry out faster if the mower is stored in direct sunlight or extreme heat, so store any spares in a cool, dark place. Also, as with many aftermarket parts, fitment can vary slightly between mower models within the same engine family, but most users report a snug, proper fit. Because the pack includes four bulbs, you can afford one not working perfectly—though that’s unlikely.
Overall, the Mudder 4-Pack is a wise purchase for any American homeowner or gardening enthusiast who wants a cheap, easy way to keep their gas mower starting on the first push. It’s practical, simple to install, and it solves a very common frustration. Whether you have a small suburban lawn, a larger rural property, or just want to be prepared for mower maintenance, these primer bulbs are a reliable spare part to have on the shelf.
The Mudder primer bulbs are made from flexible, heat-resistant rubber designed to hold up to the engine environment. According to product specs and user reports, the material offers good extensibility (stretch) and should resist cracking from normal flexing during starting. While no rubber lasts indefinitely, these bulbs are built to handle regular use without hardening as quickly as some OEM plastics. For best longevity, store the mower away from direct sun and extreme cold, and keep any spare bulbs in a climate-controlled space. The four-bulb pack ensures you have replacements ready if the installed one wears out over a season or two.
Replace a dried or cracked primer bulb in minutes with this set. You’ll need a pair of pliers and maybe a flathead screwdriver. First, locate the primer bulb on top of the carburetor or engine shroud. Use pliers to gently twist and pull the old bulb out from its retaining ring or tabs. Clean any dirt or debris from the seat. Then, push the new Mudder bulb into place until it snaps securely. Make sure it sits flush and doesn’t leak air. That’s it—no wrenching, no removing the carburetor. After installation, try priming and starting the mower to confirm proper fuel draw. If the engine starts easily after a few pushes, you’re all set.

Pros
- Affordable 5-pack offers great value for maintaining multiple mowers or having backups on hand
- Direct fit for common Briggs & Stratton engines – no modification required
- Durable rubber construction resists cracking and fuel deterioration better than some OEM bulbs
- Easy to install in minutes, even for first-time mower repairers
- Restores proper priming action, fixing hard-start issues without expensive repairs
Cons
- May not fit all engine models – always verify compatibility with your specific Briggs & Stratton engine number
- No installation instructions included, though the process is straightforward for most users
- Rubber may eventually harden over time with prolonged fuel exposure, requiring periodic replacement
If your lawn mower is struggling to start or requires multiple priming pumps before it catches, a cracked or hardened primer bulb is often the culprit. This 5-pack of replacement primer bulbs from LiteTour is designed specifically for Briggs & Stratton engines, including the Sprint Classic Quattro series. It's a simple, low-cost fix that can save you from the frustration of a mower that won't fire up on Saturday morning.
Each bulb measures 1 inch in diameter and 0.8 inches tall, matching the original part numbers 694394, 5084, and 494408. The red rubber construction is pliable enough to create a good seal yet durable enough to resist splitting from repeated pressing. Based on the product specs, this bulb is meant to restore the vacuum needed to draw fuel into the carburetor, which is essential for reliable starting. Homeowners with small to medium-sized lawns who use a push or self-propelled gas mower will find this replacement straightforward and effective.
Build quality appears adequate for the price point. The rubber has good extensibility, meaning it can stretch slightly during installation without tearing. However, like any rubber part exposed to fuel and weather, it will eventually degrade over several seasons. Having a 5-pack means you can replace it as needed without making a special trip to the store. For the budget-conscious DIYer, this is a practical advantage over buying single OEM bulbs.
Installation is about as easy as it gets: remove the old bulb by prying it out of its recess, then press the new one firmly into place until it seats. No tools, no disassembly of the carburetor. It's a five-minute job that even a first-time mower owner can handle. Just make sure your engine model is compatible – check your owner's manual or the part number on your old bulb before purchasing.
The main limitation is that this is a specific replacement, not a universal fit. It won't work on engines with a different primer bulb design or on electric mowers. Also, the lack of included instructions may be a minor hurdle for absolute beginners, but a quick online search or YouTube video can guide you through the process. Over time, exposure to ethanol-blended fuels may accelerate rubber deterioration, but that's typical for any fuel system component.
Overall, this primer bulb 5-pack is a smart buy for any homeowner with a compatible Briggs & Stratton mower. It's inexpensive, easy to install, and directly addresses one of the most common starting problems. Keep a few in your garage so you're never caught off guard when mowing season begins.
Complete Technical Guide to Priming and Starting a Lawn Mower Without a Primer Bulb
Starting an internal combustion lawn mower without a functional primer bulb requires understanding how fuel reaches the combustion chamber during a cold pull. Under normal conditions, pressing the primer dome displaces air and forces a metered charge of raw gasoline directly into the carburetor throat. When that component splits or goes missing, the engine cannot establish enough natural intake depression at pull-rope cranking speeds to draw liquid fuel from the float bowl or fuel tank. By applying safe, alternative fuel delivery methods, you can temporarily start the engine to complete your mowing duties while diagnosing whether a replacement bulb is necessary.
How Small Engine Priming Circuits Deliver Starting Fuel
Small gas engines manufactured for walk-behind rotary mowers rely on precise atmospheric pressure differentials to draw gasoline through internal metering jets. Unlike automotive engines equipped with electronic fuel injection or high-pressure pumps, small utility power units generate minimal intake suction when cranked by hand. The external rubber primer bulb acts as a low-pressure air pump that pressurizes the carburetor fuel bowl or directly pushes fuel upward into the intake tract. Depressing the bulb two to three times delivers the initial rich fuel mixture necessary for ignition against cold cylinder walls.
When the bulb material deteriorates from seasonal exposure to ethanol-blended gasoline and ultraviolet radiation, microscopic fissures develop across the flexible dome. These cracks allow ambient air to bleed into the circuit, destroying the pressure differential required to displace gasoline. Cranking the starter cord with a cracked primer results in a lean condition where spark occurs without sufficient vaporized fuel to sustain combustion. Operators often pull the recoil rope repeatedly in frustration, failing to recognize that the carburetor is simply starving for fuel.
Method 1: Introducing Aerosol Starting Fluid into the Air Intake
Using an aerosol starting fluid containing ether or heptane offers the quickest emergency solution when dealing with how to prime a lawn mower without primer bulb. To execute this method safely, first disengage the mower blade control bail and ensure the spark plug boot remains firmly seated away from fuel vapor clouds. Remove the air filter cover and take out the foam or pleated paper air filter element to expose the carburetor throat. Spray a brief burst of starting fluid, lasting no longer than one second, directly into the intake bore.
Reinstall the air cleaner assembly immediately to prevent backfire flames from escaping and to maintain correct intake air resistance. Step behind the operator console, engage the blade control bail, and pull the starter cord with a steady, brisk motion. Ether ignites at a significantly lower compression temperature than standard gasoline, allowing the engine to fire almost instantly. Once running, the engine generates sufficient sustained manifold vacuum to pull fuel through the standard carburetor jets, keeping the engine running smoothly.
While starting fluid is remarkably effective for emergency starts, relying on it on a weekly basis can damage small utility engines. Ether burns exceptionally hot and dry, stripping the protective oil film from the cylinder bore and piston rings during ignition. Repeated dry cold starts accelerate ring wear, leading to compression loss and increased oil consumption over time. Use this technique strictly as a temporary measure while sourcing a replacement primer assembly for your machine.
Method 2: Direct Fuel Priming Through the Carburetor Throat
If commercial starting fluid is unavailable, adding a tiny quantity of fresh unleaded gasoline directly into the carburetor venturi achieves a similar priming effect. Disconnect the spark plug wire to prevent accidental engine turnover while your hands are near rotating mechanical components. Remove the air cleaner cover and withdraw the filter element to gain direct visual access to the intake opening. Prepare an eyedropper, small syringe, or plastic drinking straw to meter out no more than half a teaspoon of gasoline.
Carefully introduce three to five drops of fuel directly into the carburetor throat, aiming toward the brass emulsion tube or throttle plate. Never pour unmeasured gasoline directly from a storage container, as pouring introduces excessive volume that will flood the engine crankcase. Reinstall the air filter and its retaining housing before attempting ignition to guard against sudden carburetor backfiring. Reconnect the spark plug terminal, secure the operator safety lever, and pull the starter cord to initiate combustion.
The engine should catch on the second or third pull, run roughly for a couple of seconds while consuming the liquid drops, and then settle into a smooth operating idle. If the engine fires and immediately dies, the main jet or fuel bowl may contain varnish or stale debris blocking continuous fuel delivery. In that scenario, the issue extends beyond the primer circuit and points toward a dirty carburetor that requires disassembly and thorough cleaning. Verifying that fuel flows freely from the tank shut-off valve helps isolate whether the starvation is localized to the intake circuit.
Method 3: Restricting Airflow to Simulate a Mechanical Choke
Many engines designed with primer bulbs deliberately omit an internal choke plate because the primer was intended to richen the mixture without mechanical airflow restriction. You can simulate the richening function of a traditional mechanical choke by manually restricting the intake air supply during cranking. Remove the outer air filter housing and place a clean, lint-free shop cloth loosely over the intake opening. Alternatively, placing your gloved palm across roughly three-quarters of the air horn creates an artificial low-pressure zone inside the venturi.
Have an assistant hold the operator bail lever, or clamp the bail securely to the handle, while you pull the starter rope with the air intake partially blocked. The strong vacuum created behind your hand forces gasoline upward through the main discharge nozzle into the combustion chamber. As soon as the engine coughs or fires, pull your hand or the cloth away immediately to restore normal combustion airflow. Failing to remove the restriction instantly will flood the spark plug gap with unburned liquid fuel, stalling the engine completely.
This method requires coordination and care, especially regarding rotating belts and mower deck discharge points. Never place your fingers inside the carburetor bore itself or touch moving throttle linkage levers while cranking. If you frequently encounter issues maintaining vintage mowing equipment, checking our guide on decoding mower serial numbers can help verify the manufacturing era and engine specifications before ordering replacement components. Accurate model identification prevents ordering ill-fitting parts that waste time during seasonal lawn care prep.
Diagnosing Primer Circuit Air Leaks and Structural Deterioration
A primer bulb that appears intact from the outside may still fail internally due to hardening rubber or failed retaining collars. As small engine components age, exposure to warm engine heat and winter storage cycles causes vulcanized rubber to lose its elasticity. A stiff, brittle bulb cannot compress fully or rebound quickly enough to generate the negative pressure wave required to lift fuel. Furthermore, hairline cracks often hide beneath the mounting rim or along the underside edge where the bulb presses against the carburetor body.
You can test for subtle air leakage by placing a drop of clean motor oil around the base of the rubber bulb and pressing down firmly. If tiny air bubbles appear around the retaining ring or body seam, the seal has failed and atmospheric air is leaking past the perimeter. Another indicator of failure is when the primer bulb presses down easily but remains collapsed without springing back into shape. This symptom typically indicates a blocked vent passage or a split rubber diaphragm that cannot draw air back into its internal cavity.
In engines equipped with carburetor-mounted primer bodies, such as Briggs & Stratton Sprint, Classic, or Quattro series, the primer circuit vents through a dedicated air passage in the fuel tank top. If debris, dried grass clippings, or insect nests plug this vent hole, the bulb cannot cycle air properly. Inspecting the plastic carburetor base plate for warpage is also critical, as plastic bodies can distort from over-torqued mounting bolts, allowing unmetered air to compromise the entire fuel system. Addressing these underlying mounting surface flaws ensures that installing fresh rubber components produces a lasting, airtight repair.
Carburetor Compatibility and Identifying Replacement Part Numbers
When temporary starting methods have served their purpose, replacing the worn primer bulb is essential for restoring dependable one-pull starts. Different small engine configurations utilize specific primer designs that cannot be swapped interchangeably. For instance, Briggs & Stratton engines built on the Quantum series (3.5 through 6.75 horsepower), Intek platforms (6.5 through 7.0 horsepower), and 625 through 875 series commonly utilize part numbers such as 694395, 496115, 5085, 5085H, and 5085K. These bulbs feature specific base diameters and locking tangs designed to secure into plastic air cleaner base assemblies.
In contrast, smaller displacement power units, including Sprint, Classic, and Quattro engines, frequently require part numbers 694394, 4178, 494408, or 5084. These components feature distinct dimensional proportions, typically measuring approximately 1 inch in diameter and 0.8 inches in height, with specific internal check valves or air passages. Later generation overhead valve engines, such as the Briggs & Stratton 300E, 450E, 500E, and 08P502 or 09P6 series, utilize specialized primer assemblies like part number 594281 that snap directly into modern plastic carburetor housings. Ensuring you cross-reference your specific engine code prevents improper seating that would otherwise introduce vacuum leaks into the fuel stream.
Sourcing multi-pack replacement bulbs from aftermarket suppliers like Mudder, Jerkfily, Missiscily, or SLIACOBIU ensures you keep spare units on hand for future seasonal tune-ups. Quality replacement bulbs are molded from flexible synthetic rubber engineered to withstand modern ethanol fuel blends and seasonal temperature fluctuations. Selecting the exact replacement part number matching your engine model stamped on the OHV valve cover or cooling shroud ensures proper mechanical seating and airtight performance. Keeping an extra bulb in your workshop storage drawer prevents sudden downtime when older rubber degrades in the middle of a busy cutting season.
Step-by-Step Installation of a Replacement Primer Bulb
Replacing a worn or cracked primer bulb is a straightforward mechanical repair that requires only basic hand tools such as needle-nose pliers and a flat-blade screwdriver. Before beginning any work, move the mower to a well-ventilated outdoor workspace away from open flames, pilot lights, or electrical equipment. Disconnect the high-tension spark plug lead and secure the boot away from the terminal to eliminate any risk of accidental ignition. Allow the engine to cool completely if it was recently operated using emergency starting techniques.
Begin by unlatching the air filter cover and removing the filter element to expose the carburetor mounting bracket. On models where the bulb mounts into a separate plastic retaining ring, use needle-nose pliers to compress the plastic locking tabs behind the mounting bracket. Gently push the assembly forward out of its recess, taking care not to gouge the surrounding plastic sealing surfaces. Clean any accumulated grass chaff, dirt, and dried fuel varnish from the mounting bore using a clean rag dampened with carburetor cleaner.
Position the new rubber bulb into the retaining ring or directly into the carburetor mounting hole, aligning any orientation notches with the mating housing. Press the bulb into the bore until the locking tabs snap firmly into place, creating a visible, gap-free perimeter seal. Reinstall the air filter element, ensuring that the gasket or foam perimeter seats flat without pinching. Reattach the outer air cleaner cover, reconnect the spark plug lead, and press the new primer bulb three times to verify that it rebounds crisply and delivers fuel into the intake stream.
Clearing Flooded Engine Cylinders and Spark Plug Maintenance
When attempting to start an engine without a functional primer, overzealous fuel application can easily flood the combustion chamber. A flooded cylinder occurs when liquid gasoline coats the spark plug electrodes, preventing the high-voltage electrical arc from jumping across the gap. You can recognize a flooded condition by a strong odor of raw fuel lingering around the exhaust muffler and a starter cord that pulls with noticeably reduced resistance. If the engine fails to cough after several pulls following manual priming, stop cranking immediately to prevent hydro-locking the piston.
To clear excess fuel, disconnect the spark plug wire and remove the spark plug using a standard 5/8-inch or 13/16-inch deep socket wrench. Inspect the firing tip; if the ceramic insulator and electrodes are wet with liquid gasoline, the engine is flooded. Clean the electrodes with a brass wire brush, spray them with quick-drying brake cleaner, and inspect the gap with a feeler gauge to verify factory spacing. While the plug is removed, pull the starter rope briskly five to six times to blow atomized fuel mist out through the open spark plug hole.
Reinstall the dried spark plug by hand to prevent cross-threading into the aluminum cylinder head, then torque it securely with your socket wrench. Reattach the spark plug boot and attempt to restart the engine without applying any additional starting fluid or fuel drops. The engine should ignite promptly, emitting a small puff of white or blue smoke from the exhaust as residual fuel burns away. Keeping a spare, properly gapped spark plug in your tool kit saves valuable time when troubleshooting stubborn seasonal starting issues.
Long-Term Fuel System Maintenance and Ethanol Management
Preventing primer bulb failure and carburetor starvation begins with proper fuel selection and seasonal storage habits. Standard pump gasoline containing 10 percent ethanol attracts atmospheric moisture over time, leading to phase separation inside mower fuel tanks. Water separated from ethanol accelerates corrosion on aluminum carburetor bodies and leaches plasticizers from rubber primer bulbs, making them brittle within a single season. Utilizing ethanol-free fuel or mixing a high-grade fuel stabilizer into fresh gasoline preserves rubber flexibility and prevents gum deposits in small internal metering ports.
At the conclusion of the mowing season, run the engine until the fuel tank and carburetor run completely dry before storing the machine for winter. Leaving untreated fuel in the carburetor allows volatile compounds to evaporate, leaving behind a sticky varnish that glues float needles shut and clogs primer passages. Storing equipment in a dry, shaded garage or shed shields flexible rubber components from direct sunlight and severe temperature extremes that degrade polymer bonds. Incorporating these simple fuel management habits extends the operational lifespan of your entire fuel system and ensures easy spring startup.
When maintaining your overall turf equipment setup, pairing a reliable mower with efficient yard cleanup accessories can dramatically streamline property care routines. If you manage a large residential lawn with heavy seasonal leaf drop, inspecting our guide on selecting a leaf collector for lawn mower decks helps you clear turf debris efficiently while maintaining optimal cutting airflow. A clean deck and unobstructed intake tract reduce overall mechanical strain, keeping your engine operating smoothly across all four cutting seasons. Consistent maintenance across both the cutting deck and the engine powertrain guarantees dependable performance every time you step out onto the lawn.
Resolving a broken primer bulb with temporary priming methods gets your grass cut today, but completing a permanent mechanical replacement remains the most reliable long-term solution. Whether you introduce a measured drop of fuel into the venturi, utilize starting fluid responsibly, or install a fresh rubber replacement bulb from an aftermarket kit, adhering to fundamental safety practices protects both operator and machinery. Always disconnect the spark plug lead prior to inspecting the intake, verify component part compatibility, and maintain clean fuel to ensure trouble-free engine ignition every weekend.






Write Your Review
No reviews yet. Be the first to share your experience!