


Replacing the cutting head on a brush cutter is a straightforward maintenance task that restores cutting power and ensures safety. The core process involves securing the machine, removing the old attachment, and installing a new blade or trimmer head using the correct hardware.
Understanding how to change blades on shakespeare brush cutter models helps homeowners avoid common mistakes like cross-threading or improper torque. This guide walks through the specific steps for both circular saw blades and standard trimmer heads, focusing on the tools and safety checks required for a secure fit.
Many users struggle with this task because they lack the specific wrench sizes or fail to disconnect the spark plug, which can lead to accidental starts. The process differs slightly depending on whether you are using a universal adapter kit or a brand-specific trimmer head. By following the manufacturer’s specifications for arbor size and thread direction, you can ensure the new component spins true and does not vibrate excessively during use.
Proper installation not only extends the life of your equipment but also protects you from injury caused by a loose or misaligned cutting tool. For more context on maintaining power equipment, see our guide to identifying model specifications.

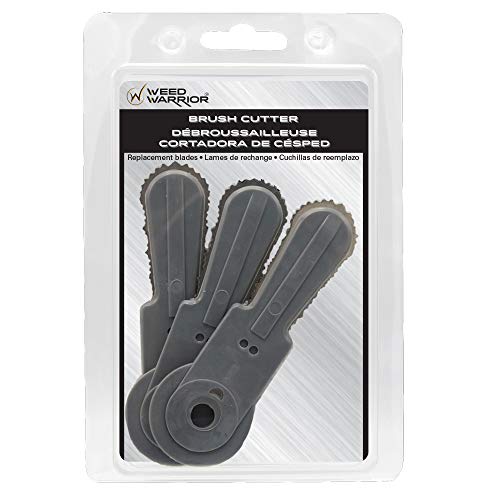
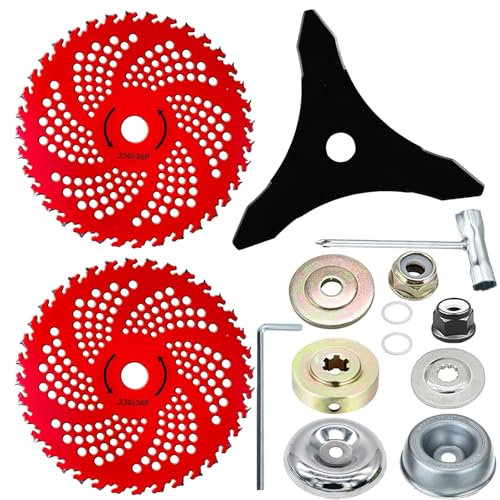

How to Change Blades on a Shakespeare Brush Cutter: Step-by-Step
Changing the blade on a brush cutter requires careful attention to safety and mechanical fit. The primary goal is to replace the worn cutting element with a new one that matches the arbor size and thread direction of your specific model. Most Shakespeare and compatible brush cutters use a standard 1-inch arbor, but always verify this before purchasing a replacement. The process begins with preparing the workspace and ensuring the engine is completely off and the spark plug is disconnected to prevent any accidental startup during the procedure.
| Component | Typical Spec | Tool Needed |
|---|---|---|
| Arbor Size | 1 inch | Calipers or manufacturer manual |
| Thread Direction | Left-hand (common) | Visual inspection of nut |
| Wrench Size | 19mm or 3/4 inch | Open-end or socket wrench |
| Blade Type | 3-tooth or 36-tooth | Gloves and safety glasses |
Before starting the physical removal, gather the necessary tools and safety gear. You will typically need a pair of open-end wrenches or a socket set that fits the specific nut size on your cutter. Many brush cutters use a left-hand thread on the blade nut, meaning you must turn it clockwise to loosen it.
This is a critical detail that trips up many first-time users. If you are unsure of the thread direction, check the manufacturer’s manual or inspect the nut for markings. Having the correct wrench size prevents rounding off the nut, which can make future removal much more difficult.
- Disconnect the spark plug wire to prevent accidental engine start.
- Place the cutter on a stable, flat surface with the blade facing up.
- Identify the thread direction of the blade nut (usually left-hand).
- Gather the correct size wrenches for the nut and arbor lock.
- Put on heavy-duty work gloves and safety glasses for protection.
Removing the Old Blade and Hardware
Once the tools are ready, begin by loosening the blade nut. If the nut is tight, you may need to use a second wrench to hold the arbor or the blade itself steady while turning the nut. This prevents the entire shaft from rotating, which could damage the internal bearings.
Turn the nut in the direction that loosens it, which is clockwise for left-hand threads. Remove the nut, any washers, and the old blade from the arbor. Inspect the arbor for any signs of wear, rust, or damage before proceeding with the installation of the new component.
It is also important to clean the arbor and the mounting surface of the new blade. Any dirt, grass clippings, or old grease can prevent the blade from seating properly, leading to vibration and premature wear. Use a clean cloth to wipe down the metal surfaces.
If you are switching from a standard trimmer head to a circular saw blade, ensure that the adapter kit includes all necessary washers and spacers. These components help center the blade on the arbor and provide the correct spacing for the nut to tighten securely.
Installing the New Blade or Trimmer Head
Position the new blade or trimmer head onto the arbor, ensuring it sits flat against the shaft. If using a universal adapter, place the washers in the order specified by the kit instructions. Typically, a thrust washer goes against the arbor, followed by the blade, and then a flat washer on the outside.
Align the blade teeth with the direction of rotation indicated on the cutter shaft. Most cutters rotate clockwise when viewed from the operator’s perspective, so the blade teeth should point in that direction. Double-check this alignment before tightening the nut, as a reverse-rotating blade can be dangerous.
Tighten the blade nut securely using the correct wrench. For left-hand threads, turn the nut counter-clockwise to tighten it. Apply firm pressure, but avoid over-tightening, which can strip the threads or warp the blade.
A good rule of thumb is to tighten it until it is snug, then give it a slight additional turn. Once tightened, spin the blade by hand to ensure it rotates freely without rubbing against the housing or the ground. If there is any wobble or contact, loosen the nut and re-center the blade before tightening it again.
Compatibility and Fitment Considerations
Not all blades are compatible with every brush cutter, so verifying fitment is crucial before purchase. The arbor size is the most critical factor, as a blade that does not fit the shaft cannot be installed safely. Most standard trimmers and brush cutters use a 1-inch arbor, but some commercial models may use different sizes.
Check the product description for compatibility with your specific brand and model. Universal adapter kits often include multiple washers and nuts to accommodate different arbor lengths, but they are not guaranteed to fit every machine on the market.
Material quality also plays a significant role in performance and safety. Blades made from manganese steel or carbon steel with carbide tips are designed to withstand the high impact of cutting through dense brush and small trees. These materials are more durable than standard steel blades, which can dull or chip quickly when used on tough vegetation.
When selecting a replacement, look for blades that are marketed for heavy-duty use if you plan to tackle thick undergrowth. The manufacturer’s specifications will often list the intended use, such as tree trimming or general grass cutting, so choose accordingly.
- Verify the arbor size matches your cutter’s shaft diameter.
- Check the thread direction to ensure the nut tightens correctly.
- Confirm the blade rotation direction aligns with the shaft.
- Inspect the adapter kit for all required washers and spacers.
- Choose blade material based on the type of vegetation you cut.
Safety Checks and Final Verification
Before reconnecting the spark plug and starting the engine, perform a final safety check. Ensure the blade nut is tight and the blade is securely attached. Spin the blade by hand one more time to confirm there is no wobble or interference with the cutter housing.
Wear appropriate personal protective equipment, including safety glasses, hearing protection, and sturdy boots, when operating the cutter. Keep your hands and feet clear of the cutting path, and maintain a safe distance from bystanders. If you hear any unusual noises or feel excessive vibration during the first few minutes of use, stop the engine immediately and re-check the installation.
Regular maintenance of the blade and arbor extends the life of your equipment. After each use, clean the blade to remove sap, dirt, and grass residue. Inspect the blade for any cracks, chips, or excessive wear, and replace it if necessary. A sharp, well-maintained blade cuts more efficiently and puts less strain on the engine.
For more information on maintaining your power tools, refer to our guide to electric mower care. By following these steps, you can ensure your brush cutter remains safe and effective for all your outdoor cutting tasks.






Write Your Review
No reviews yet. Be the first to share your experience!