


A mower that starts after a charge but goes flat again can point to a charging fault, not just an old battery. To understand how to tell if lawn mower battery is charging, compare its voltage with the engine off and running, then check whether the terminals and charging circuit are sound.
A 12-volt lead-acid battery near 12.6V to 12.8V at rest is generally fully charged; a low reading alone does not identify the failed part. A reading around 12.2V indicates substantial discharge, while a reading below 10.5V can indicate a damaged or failed cell. For more on fitment before replacing a battery, see this guide to lawn mower battery compatibility.
These checks apply to gas riding mowers and zero-turns with 12-volt starting batteries, not proprietary high-voltage cordless packs. Use the mower manual for model-specific charging and safety instructions, and wear eye protection and acid-resistant gloves around lead-acid batteries. A voltage check can narrow the problem, but it cannot by itself prove that a battery will deliver enough current to crank the engine.
Top Products

Pros
- Maintenance-free AGM design—no water refills needed
- Broad compatibility with many walk-behind mowers and outdoor equipment
- Lightweight and compact for simple installation
- Affordable price point compared to OEM batteries
- 2-year warranty adds extra value
Cons
- Capacity (3AH) may be too low for larger mowers or extended cranking needs
- Some users may need to check terminal orientation for a perfect fit
The PowerStar YTX4L-BS is a compact 12V 3AH AGM battery designed specifically for electric-start walk-behind lawn mowers, with particular compatibility for Snapper models and many other brands. This battery is an ideal replacement for homeowners who want a reliable, maintenance-free power source for hassle-free starting—no more pulling cords on Saturday mornings. It also suits apartment dwellers with small yards who use electric-start mowers for quick trimming.
In terms of real-world performance, this battery delivers consistent cranking power for starting the engine, thanks to its advanced AGM (Absorbed Glass Mat) technology. It provides stable voltage to run the starter motor reliably, even in moderate weather. While it is not designed for powering accessories, its primary role as a starting battery is well-suited for typical mowing sessions. The battery holds enough charge for multiple starts per mowing session, though users with larger decks or longer cranking may want to consider a higher capacity model.
Build quality is solid for a budget-friendly battery. The AGM construction means it is sealed, spill-proof, and resistant to vibration—important for the rough ride of a mower. The casing feels durable and should resist corrosion from moisture or debris. At just 3.09 pounds, it is easy to handle during installation, and its compact dimensions (4.4 x 2.7 x 3.3 inches) allow it to fit in most standard battery trays without modification.
Setup is straightforward: simply connect the positive and negative terminals (usually labeled) and secure the battery in the tray. No water filling or electrolyte checks are needed. Maintenance is essentially zero—just keep the terminals clean and ensure the battery is charged during storage. Some users may find that the terminal orientation (position of positive and negative posts) requires a slight adjustment with adapters or cables, but this is typical for many replacement batteries.
A realistic limitation is the 3AH capacity, which is on the lower end for batteries in this class. If your mower requires extended cranking (like in very cold weather) or has a large engine, this battery may not provide as many starting attempts per charge. Also, while it fits many models, it is always wise to double-check terminal placement and dimensions against your original battery to avoid a loose fit.
Overall, this PowerStar battery is a practical, affordable choice for homeowners with smaller walk-behind mowers who want a drop-in replacement with a decent warranty. It is best suited for routine mowing in moderate climates where the engine starts easily. For those with larger equipment or very cold winters, a battery with higher cold-cranking amps (CCA) or larger capacity may be more suitable. But for its price and convenience, the YTX4L-BS delivers good value for everyday lawn care.

Pros
- Specifically designed to replace multiple OEM part numbers (136-9126, 114-1588, 104-7401, etc.), ensuring a direct fit for many Toro mowers
- Very affordable price point compared to brand-name chargers, making it a great budget option for homeowners
- Compact size and lightweight build simplify storage and handling—no bulky charger to deal with
- Simple plug-and-play operation: just connect to the mower battery and wall outlet, no complicated setup required
Cons
- Compatibility is limited to specific Toro and Lawnboy models, so you must verify your mower's part number before purchasing
- Brand is less well-known than Toro or other major accessory makers, which may concern some buyers about long-term reliability
- Cord length of 6.1 feet may be too short if your outlet is far from where you store the mower, potentially requiring an extension cord
If you own a Toro or Lawnboy 22-inch electric mower and need a replacement battery charger, the Kzfuli 114-1588 is a practical, budget-friendly option to consider. This charger is designed to replace several OEM part numbers, including 136-9126, 114-1588, 104-7401, and 20334C, among others. It's specifically intended for homeowners who want to keep their mower's battery charged without paying a premium for a brand-name charger.
Based on the product specifications, the charger outputs 14.5V and works with input voltages from 100-240V AC, making it compatible with standard U.S. household outlets. The 6.1-foot power cord gives you enough reach for most garage or shed setups, though you might need an extension cord if the outlet is farther away. The compact dimensions (2.36 x 1.5 x 1.3 inches) and light weight (0.1375 lbs) mean it won't take up much space on a shelf or in a tool box.
For many American homeowners, this charger may be a convenient spare to keep on hand, especially if you have multiple Toro mowers or want a backup in case the original charger fails. The compatibility list includes popular models like the 10642, 10666, 10686, 10796, and 17734, but it's crucial to double-check your mower's part number to ensure a proper fit. The seller also offers customer support for compatibility questions, which adds a layer of reassurance.
In terms of build quality, the charger appears to be a standard plastic-cased unit, typical for this price range. It's not ruggedized, but for indoor storage and occasional use, it should hold up fine. The black color is neutral and unobtrusive. Since this is a charger and not a mower, there's no cutting performance or engine to evaluate—its job is simply to deliver the correct voltage to your battery, and based on user feedback (though limited), it seems to do that reliably.
One realistic limitation is that this charger is only compatible with specific Toro and Lawnboy electric mowers, not with other brands or gas-powered models. Also, because it's a third-party product, some buyers may be hesitant about long-term durability compared to an OEM charger. However, the affordable price makes it a low-risk purchase for those who need a quick replacement.
Overall, if you have a compatible Toro or Lawnboy mower and need a functional charger without overspending, the Kzfuli 114-1588 is a solid choice. Just confirm your model number before buying, and you'll likely find it does the job as expected. For homeowners who are already invested in Toro cordless mowers, this charger offers a cost-effective way to keep your equipment running.
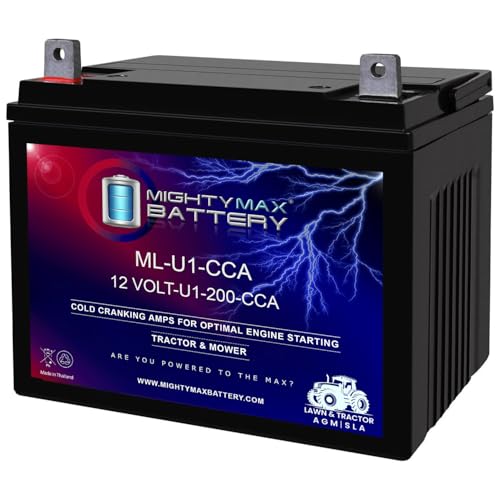
Pros
- Reliable starting power with 200CCA for quick ignition
- Spill-proof AGM design enhances safety and mounting flexibility
- Vibration and shock resistant for durability on bumpy lawns
- Maintenance-free operation saves time and effort
Cons
- Does not include wire harness or mounting accessories, so you may need to reuse existing hardware
- Some users may find the terminal orientation requires careful checking to match their mower setup
- Not suitable for all mower models, so compatibility should be verified before purchase
The Mighty Max Battery ML-U1 is a 12-volt sealed lead acid battery designed to replace the battery in many Craftsman lawn tractors and mowers, including the model 25780. This battery is a practical choice for homeowners who need a dependable power source for their riding mower without the hassle of traditional wet-cell batteries. With 200 Cold Cranking Amps, it provides enough power to start most single-cylinder engines commonly found on residential lawn tractors, even during cooler spring mornings or fall afternoons.
Performance-wise, this battery uses AGM (Absorbent Glass Mat) technology, which means it is spill-proof and can be mounted in any position. This flexibility is helpful if your mower has an odd battery tray orientation or limited space. The battery also handles deep discharges better than standard flooded batteries, which is a plus if you occasionally leave lights on or have a parasitic drain. However, it is not designed for high-drain applications like powering accessories for extended periods—its main job is starting the engine.
Build quality appears solid for its price point. The case is made from durable ABS plastic that resists cracking from vibration and impacts during mowing. The terminals are standard SAE posts, but you may need to check the polarity: this model has positive on the left and negative on the right. Some users report that the included screws are adequate, but you will need to reuse your existing wire harness and mounting hardware, as none are included.
Setup is straightforward if you are comfortable with basic tools. Simply remove the old battery, clean the terminals, and install this one using the provided screws. Because it is maintenance-free, you won't need to check water levels or clean corrosion as often as with a wet-cell battery. Storage is also easier since the battery can be stored on its side if needed, though keeping it upright is recommended for longest life.
One realistic limitation is that this battery may not be compatible with all mower models, especially those requiring different terminal configurations or higher CCA ratings for larger engines. Always verify your mower's battery group size and polarity before ordering. Additionally, the lack of included mounting hardware means you may need to purchase a battery hold-down kit separately if your old one is missing or damaged.
Overall, the Mighty Max Battery ML-U1 is a solid replacement option for Craftsman lawn tractor owners who want a reliable, maintenance-free battery at a reasonable price. It works well for typical suburban lawn mowing needs, but if you have a larger tractor with a high-compression engine or live in extremely cold climates, you might consider a battery with higher CCA. For most homeowners, this battery offers a good balance of performance, durability, and value.
How to Check Whether a Mower Battery Is Charging
The clearest practical check is to measure the battery at rest, start the mower, and measure again with the engine running. A working charging system should raise battery voltage above its resting level; the supplied diagnostic benchmark is approximately 13.5V to 14.5V DC at full operating throttle. If voltage stays near the resting reading or falls, investigate the battery connections and charging circuit rather than assuming the battery is being replenished.
What the Charging System Is Doing
A typical gas riding mower uses a 12-volt battery to operate the starter and supply electrical power before the engine runs. Once running, the engine’s charging components produce electrical output that is regulated for the battery and mower circuits. The stator and voltage regulator are key parts of that process, so a battery that repeatedly discharges may have a charging-system issue even if it can still start the mower after external charging.
The engine running does not, by itself, prove that the battery is charging. A mower may continue to operate after starting even if charging output is weak, while accessories or electrical loads continue drawing power. A battery can also have adequate resting voltage but lack the capacity to crank reliably. Treat voltage as evidence to interpret alongside starting behavior, cable condition, and the mower’s service information.
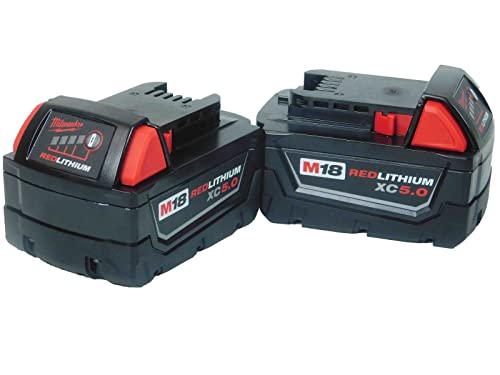
Battery chemistry and equipment design matter. This guide’s numerical benchmarks concern 12-volt lead-acid starting systems; they do not apply directly to 40V, 56V, 60V, or 80V cordless mower packs. For a cordless mower, use the manufacturer’s charger and pack indicators, and follow its instructions for charging, storage, and temperature limits. Do not apply car or riding-mower charging assumptions to a proprietary lithium-ion pack.
Measure Resting Voltage Before Starting
Park on a stable surface, disengage the blades, set the parking brake, and switch off the ignition and accessories. Allow the battery to sit without charging or running so the reading is not simply a temporary surface charge. Check the mower manual before accessing the battery, and do not work on a cracked, swollen, leaking, or otherwise damaged battery. If acid is present, avoid contact and follow the manufacturer’s handling guidance.
Set a digital multimeter to DC volts on a range that accommodates a 12-volt battery. With the meter leads placed on the battery posts, red on positive and black on negative, record the reading without letting the probes bridge the terminals. A reading around 12.6V to 12.8V is a useful fully charged resting reference. A result near 12.2V suggests the battery is substantially discharged, but it does not establish whether the battery, a cable, or the mower’s charging system caused the discharge.
A result below 10.5V is especially concerning because it can indicate a dead or compromised cell. Do not keep trying to crank a battery that gives a very low reading, and do not assume an ordinary recharge will restore a damaged cell. If the case is swollen, leaking, or unusually hot, stop and follow the battery maker’s safety instructions instead of charging it. Use a charger explicitly suitable for the battery’s chemistry and voltage.
Record the voltage before making changes. That baseline helps distinguish a battery that was already discharged from one whose voltage falls after the mower runs. If the reading is low, charge the battery according to the mower and battery manufacturers’ instructions, then let it settle and measure again. A battery that accepts charge but quickly loses it may be degraded, or the mower may have an ongoing drain or charging fault.
Compare Voltage with the Engine Running
Once the battery and terminals appear safe, start the mower normally and keep clear of moving parts. Set the meter to DC volts and measure across the battery posts with the engine running. Follow the equipment manual for the specified throttle position and test procedure; the general benchmark supplied here is 13.5V to 14.5V DC at full operating throttle. Do not reach across belts, blades, or other moving components to obtain a reading.
A running reading in that range supports the conclusion that charging output is reaching the battery at the time of the check. It does not certify every part of the system or guarantee that the battery can hold a charge. If the reading remains close to the resting voltage, or drops below it, the battery may not be receiving adequate charging output. Check the meter setup and connections first, then consult the mower’s wiring diagram and service instructions before diagnosing individual components.
A reading above the stated range also deserves attention rather than being treated as extra charging capacity. The regulator’s role includes controlling output, and an abnormal result may point to a regulator or circuit problem. Do not replace the stator solely because one voltage reading looks wrong. Model-specific charging designs and test points vary, so use the manufacturer’s procedure or have a qualified repair shop verify the circuit.
Take readings in consistent conditions and note whether accessories are on, since electrical loads can affect results. If the mower manual specifies a particular engine speed, connector, or test method, follow that procedure instead of relying on a general benchmark. Never disconnect a battery cable while the engine is running as a charging test. That shortcut can cause electrical damage and does not replace a proper voltage check.
Inspect Terminals, Cables, and Ground Connections
Corrosion, loose terminal hardware, or a poor ground can interrupt charging current and mimic a failed battery or regulator. With the mower off and the key removed, inspect the posts, cable ends, ground connection, and visible wiring for looseness, corrosion, fraying, or heat damage. Do not allow a metal tool to connect a battery terminal to the mower frame. Lead-acid batteries can release explosive gas, so keep flames, sparks, and smoking materials away.
If battery removal is needed, follow the equipment instructions and disconnect the negative cable first to reduce the risk of a tool shorting against the chassis. During installation, connect the positive cable first and the negative cable last. Maintain correct polarity: positive to positive and negative to negative. Wear eye protection and acid-resistant work gloves, and do not force a terminal bolt or cable into a position that strains the connection.
Terminal orientation matters when a replacement is involved. Group U1 and U1R batteries can place the positive post on opposite sides, and short factory cables may not reach if the layout is wrong. Confirm the original battery’s group, terminal positions, hardware, and the mower’s required specifications before buying. A replacement that can be physically placed in the tray is not necessarily wired correctly for that mower.
Product details can help illustrate why fitment checks matter without establishing compatibility for every machine. The PowerStar-YTX4L-BS listing describes a 12V, 3Ah AGM/SLA battery and gives compact case dimensions; it is not the same specification as a Group U1 tractor battery. The Mighty Max ML-U1 listing identifies a 12V, 200 CCA sealed lead-acid battery, with positive on the left and dimensions of 7.62 by 5.00 by 7.00 inches. Verify the mower maker’s required battery type and fit before selecting either product.
Separate a Charging Fault from a Weak Battery
A mower that clicks rapidly may have insufficient voltage under load, a weak connection, or another starting-circuit problem. A single click, silence, or slow cranking also does not identify one cause on its own. Start with the resting measurement and terminal inspection, then compare running voltage. If the battery is charged but the starter still struggles, a load test can help determine whether the battery can supply cranking current.
Resting voltage and cranking voltage answer different questions. The first estimates charge state; the second shows how far voltage falls while the starter places a heavy load on the battery. A battery can show a reasonable resting number and still collapse under load because of internal deterioration. The diagnostic benchmark provided for a cranking check is that voltage should remain above roughly 9.6V under load, but use the mower and battery manufacturers’ testing procedure because test conditions affect interpretation.
If voltage at the battery stays healthy during a failed start, inspect the starting circuit rather than replacing the battery automatically. A solenoid, starter, ignition circuit, ground, or safety switch may be involved; do not bypass interlocks or bridge terminals to test them. If the battery voltage falls sharply, check cable connections and have the battery load-tested with suitable equipment. These steps narrow the possibilities without treating a symptom as proof of a single failed component.
When the running reading is outside the expected range, the stator, regulator, wiring, connectors, and fuses may need inspection. A blown fuse, damaged connector, or poor ground can interrupt the circuit even when a charging component itself is serviceable. Consult the correct wiring diagram before probing unfamiliar connectors, and avoid testing exposed wiring near moving parts. If the diagnosis requires access to engine wiring or specialized tests, a repair shop can check the system without guesswork.
Why the Battery Keeps Going Flat
A battery that loses charge between mowing sessions may be failing to hold energy, may not be getting recharged, or may be supplying power to a drain while parked. Begin by charging it with a suitable charger, checking resting voltage after it settles, and measuring charging output with the engine running. If charging output is within the stated range but the battery later goes flat, the battery’s condition or a parked electrical load becomes more likely. A single check cannot distinguish those possibilities completely.
Winter storage can leave a lead-acid battery discharged for months. Prolonged discharge can contribute to sulfation and reduce the battery’s ability to accept or retain charge. Follow the mower and battery makers’ storage instructions, keep the battery appropriately charged, and use a compatible smart maintainer if recommended. Do not leave an unsuitable charger connected indefinitely, and do not charge a frozen or damaged battery.
If a charged battery repeatedly loses voltage while the mower is parked, investigate a possible parasitic draw rather than repeatedly charging it without finding the cause. Accessories or a faulty circuit can consume power with the ignition off. Measuring current draw requires the correct meter setup and a model-specific procedure; placing a multimeter in current mode directly across the battery terminals can create a short. If you are unsure how to isolate a circuit safely, request service help.
For a mower that needs an external jump to start, follow the equipment and battery instructions and use correct polarity. If jump-starting a 12-volt riding mower or zero-turn from a passenger vehicle, the donor vehicle’s engine must remain OFF to help prevent damage to the mower’s stator and voltage regulator. Do not allow clamps to touch each other or the mower frame, and stop if the battery is damaged or leaking. A jump can start the mower, but it does not show that the charging system is working.
Choose a Charger and Replacement Carefully
A separate charger can restore charge when the mower’s charging system is not running, but the charger must match the battery voltage and chemistry. The listed 114-1588 Lawn Mower Battery Charger specifies a 14.5V output and compatibility with particular Toro and Lawn-Boy models and part numbers. Check the connector, equipment model, and replacement part number against the product listing before use. Do not treat a charger listed for certain walk-behind mower models as a universal riding-mower charger.
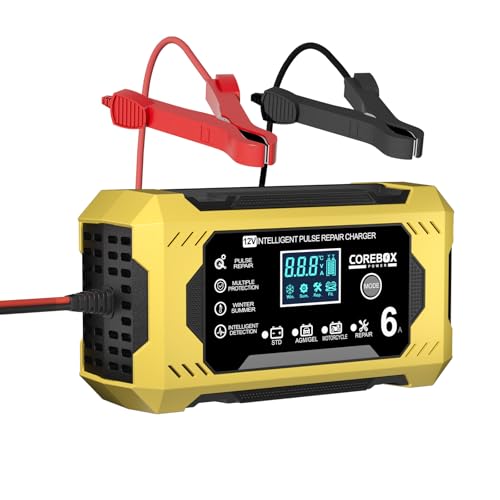
Follow the charger’s instructions for connection order, charging conditions, and disconnection, as well as the battery manufacturer’s guidance. Use a charger with the correct profile for an AGM or other sealed lead-acid battery; do not assume a high-current automotive charger is suitable. Keep the battery in a ventilated area and away from ignition sources. Stop if the battery becomes unusually hot, swells, leaks, or gives off an abnormal odor.
Replacement selection should begin with the mower’s manual or original battery label, not a product name that merely says lawn mower. Match voltage, battery group or dimensions, terminal orientation, terminal hardware, and the equipment’s required cranking rating. For example, the Mighty Max listing’s 200 CCA is a product specification, not proof that it meets the requirement of a particular tractor. The PowerStar listing describes 3Ah capacity, which likewise should not be confused with a mower’s required starting-battery rating.
Sealed AGM construction may suit buyers who prefer a sealed lead-acid format, but it still requires correct charging and compatible fitment. Conventional flooded batteries have their own maintenance and handling requirements, while 12V LiFePO4 starter replacements require explicit approval for the mower’s charging system and specified charger. Do not substitute a high-voltage cordless pack for a 12-volt starter battery. Chemistry, voltage, dimensions, and charging behavior must all match the equipment.
If you are comparing replacement options, our riding mower battery selection guide can help frame the fitment questions to check. Product listings are starting points, not substitutes for the mower’s manual or a verified part match. Check polarity carefully before connecting cables, especially where the original cables have little slack. Never energize a battery with reversed connections.
Use the Readings to Decide What to Do Next
A low resting reading followed by normal running voltage suggests the charging circuit may be replenishing the battery, but the battery still needs a suitable recharge and a check that it holds charge. A low resting reading with low running voltage points toward a charging or connection problem that needs further diagnosis. Normal readings at rest and while running, paired with slow cranking, make a load test and starting-circuit inspection more useful than replacing parts at random. Record readings and conditions so a technician can see what changed.
Repeat a measurement if the meter leads were poorly placed, the engine speed was inconsistent, or the result conflicts with the mower’s behavior. Confirm the meter is set to DC volts and that its leads are in the correct meter sockets. Do not use resistance or continuity mode on an energized circuit. If wiring is damaged, connectors are inaccessible, or readings remain abnormal after basic checks, stop and use the service procedure for that mower.
The useful answer comes from comparing measurements, not relying on a dashboard icon or the fact that the engine runs. A resting reading near 12.6V to 12.8V, followed by approximately 13.5V to 14.5V DC at full operating throttle, supports that the battery is charged and receiving charging output during the check. If those readings do not appear, inspect connections and follow the model-specific diagnostic path before buying a replacement. Correct polarity and manufacturer-approved charging remain essential throughout.



Write Your Review
No reviews yet. Be the first to share your experience!